self-adhesive DIY lampshade

Budget:

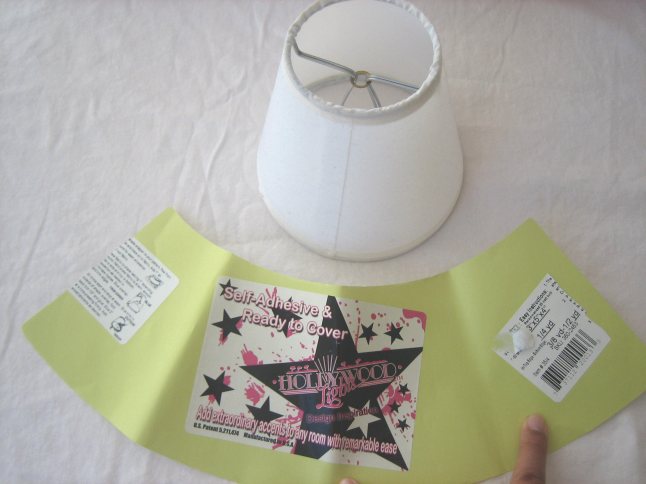
  • $6 for lampshade template with self adhesive surface
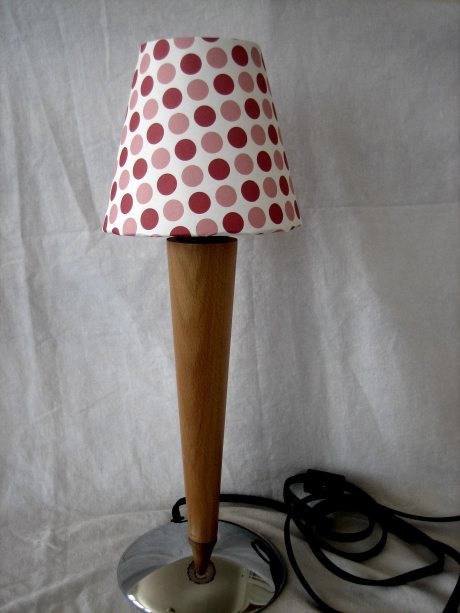
  • $3.5 for polka dot paper

Time:

  • about 30 minutes
Step 1: lining up the raw materials.


self-adhesive lampshade


Step 2: trace the green template on the back of the paper I wanted to use on my lampshade.

add an inch on all side of the template for wrapping.

Step 3:  cut out the traced paper pattern.  Start carefully lining the paper on the self-adhesive surface


Step 4:  Wrap the extra margin to the inside of the shade.  Make cuts along the side to the paper bends smoother.  Tape down the margin of the paper that’s now inside of the shade.
Done.


1st treasure hunt at Alameda Point Antiques & Collectables Faire

For many months, I’ve been wanting to check out Alameda antique faire/flea market, which happens once a month.

It was such a HUGE market with much to see.   I’m quite bummed that I didn’t bring a camera because our weirdest sighting included a space suit!

Finally after walking around for 3 hours with my willing partner-in-crime, we picked up a few items to add to our space.

1)  Buttercup Federalist Ironstone dish:  serving bowl?

2)  cute small stool with reupholstered top

3)  decanter:  it’s where our gin calls home now

4)  vanity table – pictures to come

First visit to SF Flower Mart

Budget:

  • $18 for 3 large batches of flowers.

I visited LA Flower Market long time ago and have been meaning to stop by the one in SF for quite a while now.  First impression of SF Flower mart was that:  “hmm… it doesn’t seem very big”.  Well, it’s not as big as the one in LA but still have lots of pretty flowers at good prices for my little adventure.

Here is some pictures for my splurge of $18… and many more of the pink flower buds that will open up well in the next few days.  Happy Monday to me. 🙂

harmonizing bedroom dressers and night stands

Part of the fun/charm of moving in with a partner for the first time is the combing of your worldly possessions that, often, don’t match.  Between the 2 of us, we managed to have 2 night stands and 2 dressers.  Every one of them had its own style & color.  I’ve wanted to do something about it for a long while now.

Finally, I decided to pickup 2 shades of blue paint in the same family so they will look cohesive, without being overly matchy.

Budget:

  • $24 for paint
  • $3 for sand paper
  • $0 for old dressers and night stands

Time:

  • small night stands took about 1.5-2 hours EACH!  sanding really took a while.
  • dressers took about 2-4 hours each with all the sanding, prepping, and painting.

-room before-

-night stands: before-

-night stands: after-

-Night stand #1 & #2 + Dresser #1 & #2-


Toilet Paper Rolls turned wall art

I saw this post on Design *Sponge of this quick project from Tali and thought I can use some home made art to decorate my wall space 🙂

Budget:

  • $0 for toilet paper rolls.  This wasn’t hard but just time consuming to gather all the rolls
  • $0 for scissors, pen, ruler, paint, glue, staple that I already had

Time:

  • 2 hour

Step 1: Collect your rolls and take off the remaining toilet paper pieces

Step 2:  cut each roll to roughly 5 equal parts

Step 3:  arrange the pieces in different patterns.

I wasn’t sure where I was going to put it, so I just started to play around.

Step 4:  painting the rolls with different colors.

I glued some of the mini rolls together first before I started painting.  That wasn’t too smart.  I would’ve been better off with my paint job if I had painted the rolls first, cut them, then arrange into the pattern I want, then glue them.

Step 5:  After glue and paint had dried, I used thumb tags to arrange the rolls on the wall.

A month later…


Small table/shelf for the Water Closet

BUDGET:

  • $3 or $0… part of a large chunk of stuff I got from a guy in a moving sale

  • $0 for paint (left-over )

TIME:

  • <1 hour

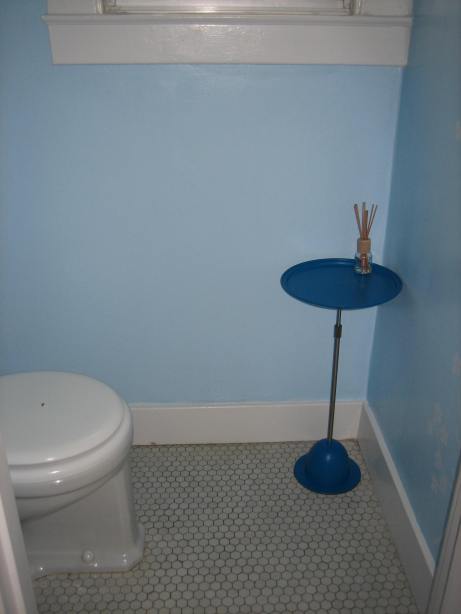
A new feature in this apartment that I never had in any previous apartments was the separate bathroom (with tub and sink) and water closet (just the toilet).  I was told it is a very “San Francisco” and “charming” characteristics.

I don’t know about you, but sometimes I bring reading materials when I “do my business”.  There’s got to be a place to set down the materials when you need to.  However, with our small space, it needs to be something with small foot print.

SO, I’ve been on a search for that perfect little table.  Finally, over the past weekend, I found it in a moving sale!

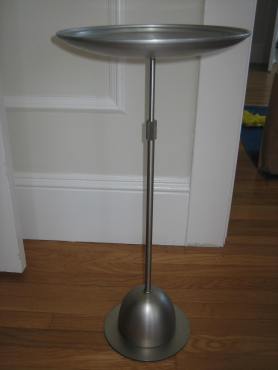
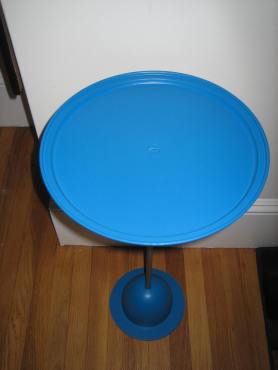
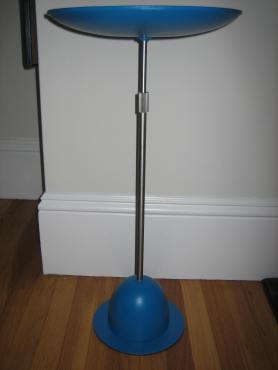
Small blue stand (1)

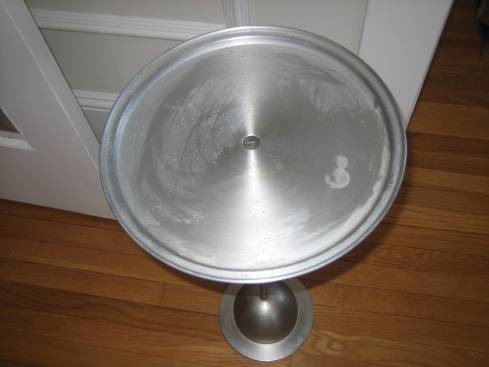
It was used outdoor with planters on top of it.  There was quite a bit of rust, especially on the tray.

Small blue stand (2)

After cleaning & painting, ta-da!

Small blue stand (4) Small blue stand (3)

I left the pole section the original color to provide a little contrast.  Now we have  a little “table” in the water closet! 🙂

Small blue stand (5)

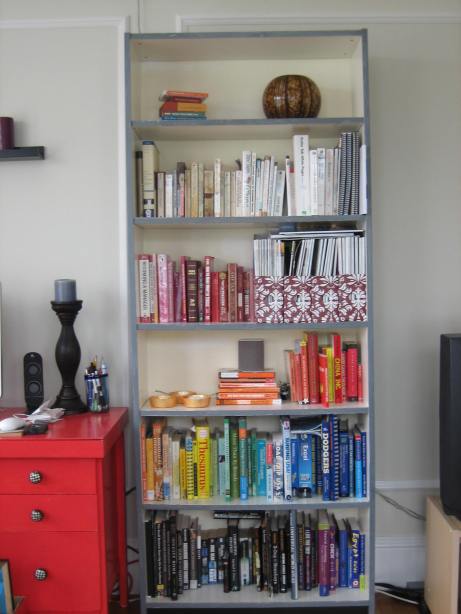
Updating bookshelf + arranging books by colors

Budget:

  • $0 for bookshelf (inherited from an old roommate)
  • $0 for paint (left-over)

Time:

  • 2.5 hours

Our apartment was painted with a lot of cream wall colors & white trims through out.  It’s nice and  serene and makes white furniture disappear.

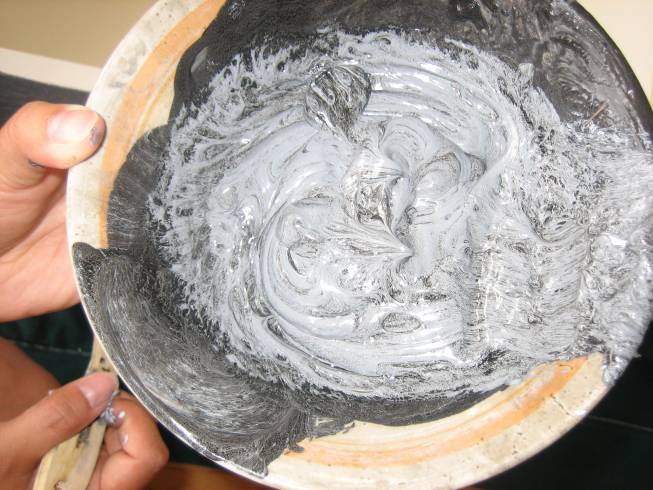
I have inherited a large white bookshelf from an old roommate years back.  It’s a nice size and decently built  but definitely showing its age. While brainstorming what color to paint it with by using what I already have, nice boyfriend suggested “grey”!  Perfect.  I have black, and I have light blue and white.  Isn’t grey just black mixed with a lighter color?


So the great mixing process began.  Hand mixing paint colors reminded me of mixing baking batter without recipe.  You have your base of whatever already in the bowl.  Then, you slowly pour in the additional ingredient.  Too much, your cake won’t rise.  Too little, you cake tastes funny.  My mixing bowl looked like this:

Grey bookshelf (3)


Oh, forgot to mention that before any paint job, you need to prep your surface.  That means sanding, wiping with damp towel, and taping the edges so you don’t paint over the area that you don’t want to paint.  This is also my least favorite part of the painting.  It’s time consuming, and I’m much more interested in taking my paint brush to the object.

I decided to go with grey on the exterior to the bookshelf while leaving the interior white so the color wheel that I am going to organize the books by will stand out.  To be clear, I didn’t invent this method.  I saw it on a HGTV show sometime and have been wanting to try it.  Here is my top 3 reasons why I think it’s a good idea:

  1. Visually Appealing: organized colors make the space look more thought out, instead of just piling books on your shelf.  Would’ve been even cooler if I had a horizontal shelf.

  2. Discovering new books: sure, organizing books by subject makes perfect sense.  I had been doing that for as far as I can remember.  It’s great for finding a book that you already know you’re looking for.  But what happens to the other less-favored ones?  When will they ever get read if you don’t pick it up?  This way or organization throws you in an unfamiliar order and forces you to pick up more books.

  3. Why not?  I’m not operating a bookstore or a library here:  It’s really not like I have seas of books that I need to reference to all the time.  Besides, it’s in my own space.  As long as the 2 people living here are happy with the arrangement, it’s all good.


Adding a small detail to make it more interesting, I also painted the very bottom black.  It kind of reminds me of the ‘exposed legs’ of couches/sofa/love seat.

After painting, I left the shelf to dry for hours.  I touched up some of the backing with white paint I had because there were scratch marks.  The colors weren’t really a match.  Oh well… the books will color them.

Shelf finally dried.  I sanded it with super fine steel wool for the finished look.  Then the great arranging began.  I arranged the books by colors first.  Then within the piles of the same color, I divided them by shades.  Having a color wheel image near by was pretty helpful.

Here is the finished look!

Shelf 003

Making a Basic Upholstered Head Board

Budget:

  • $12 for 1/4″ plywood
  • $20 for fabric
  • $27 for extra loft batting

Time:

  • about 30 min for putting it together.
  • probably an hour of shopping
there's quite a bit of ranting & rambling in this post.  be warned.

Our bed recently got upgraded from sitting on the floor to having pallets underneath.  Yep, pallets.  Why pallets, you ask?  Well, the basic metal bed frame squeaks & I always have a fear of falling through the middle.  So, I prefer to have my bed sitting on a solid foundation, i.e. the floor, or platform.  Since our bedroom is large but not quite big enough for a platform bed, we kept brainstorming.

I initially grabbed the first pallet when we went wine tasting. My grand vision was to make a headboard out of 2 pallets.  Wouldn’t that be really rustic and creative?  1 pallet grew to 2 (thanks to a willing and helpful bf).  Unfortunately, the 2 did not match!!! oh darn!  1 pallet was just too narrow standing behind the bed by itself.

After more pallet hunting & brainstorming later, I decided to make a upholstered headboard instead.

Trekking out to Colma from SF (I know, such a LONG 8 mile drive!), I was happily browsing away in Jo-Ann.  I had decided that I needed 72″ of fabric.  Not bad.  However, I somehow thought the prices I saw was per foot, instead of per yard (yes, quite silly, but that just showed how inexperienced I am at buying fabric… and also made me miss being in a metric-based country, where calculation was simply moving the decimal point!).

Anyhoo…, foam also turned out to be quite expensive (well, expensive in the sense that I was still in my false yardage calculation state of mind).  I took the advice of a store staff to go with the extra-loft/thick batting and get the thickness by using a super large sheet and fold it a few times.

Finally I got all my components home.  🙂

The assembly process was surprisingly quick.

Step 1: wipe down the plywood.  It was pre-cut at Home Depot when I bought it.  They will do the first 2 cuts for free if you need it.

Step 2: iron the fabric.  ahhh, pretty coral pattern.  I think it’s not too girl-y.

Step 3: fold the batting as many times as I could to cover the board & staple it.  I did this process quicker than I expected and had too much fun to take pictures.

Step 4: staple the fabric all over it.  Try to make the fabric as smooth as I could.  Ta-da!  I got a headboard. 🙂

First try on decoupage

Budget:

  • $5 for mod podge
  • $0 for paint, wrapping paper, and drawers/shelf (left over)

Time:

  • about 30 min.

I originally got this item from a neighbor who was packing up after their garage sale.  They didn’t want to carry it home, and I thought I could do something interesting with it.

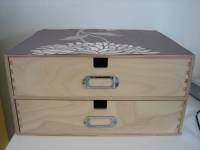
First, I followed the instructions found on the internet.  I wiped the chest(?) down, applied mod podge on top. Then I put some at the back side of my wrapping paper and carefully applied it.  I thought this was going to be a very straight forward simple project.  However, the paper started to bubble up quickly no matter how much I tried to smooth out the surface.   I tried pushing with my fingers, ruler, and credit card.  It was no use.  The surface still looked quite blotchy. Like this ->

Oh yuck.  That was ugly.

So I removed it and contemplated what to do.  Luckily, on the same day, Whimsygirl gave me a roll of “wall paper” from Target.  I figured I’d try decoupage again with thicker paper.

That stuck better.  1st decoupage (6)

Then I painted the front of the drawers brown with left over brown paint.  1st decoupage (11)